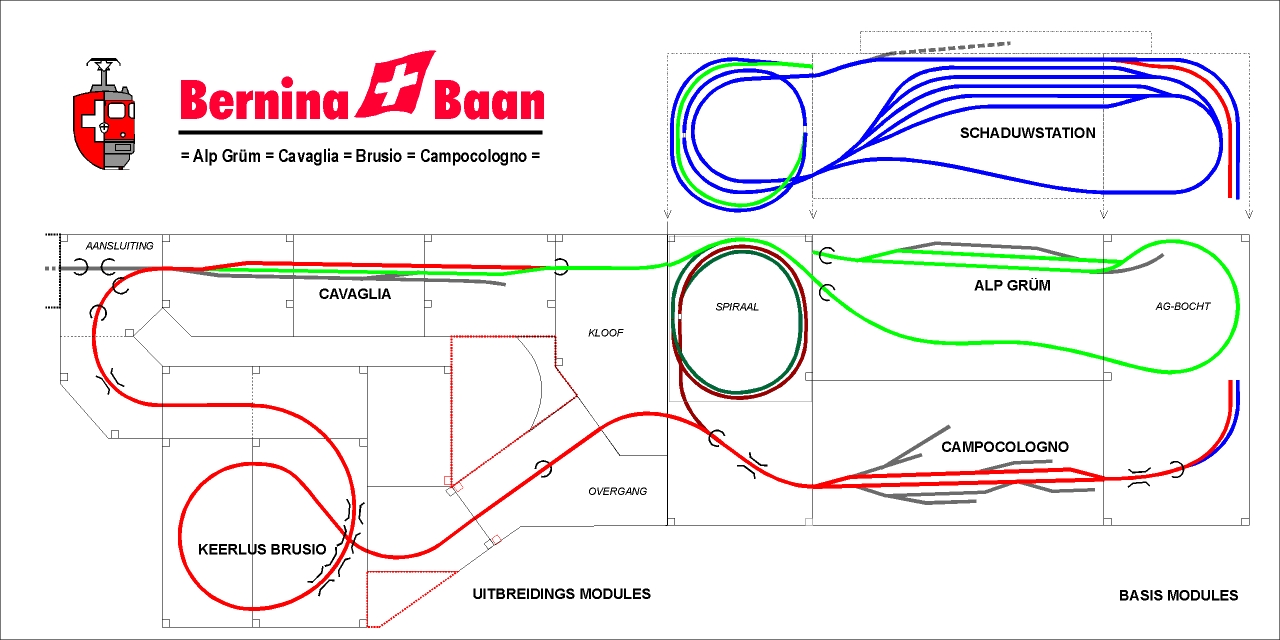
The basis of our model (variation 1) is really an eight of which one loop, the largest, can be driven on both directions. We have twisted our loop a little bit to make it fit on 2 by 4 meter. I'll explain this a bit more detail here.
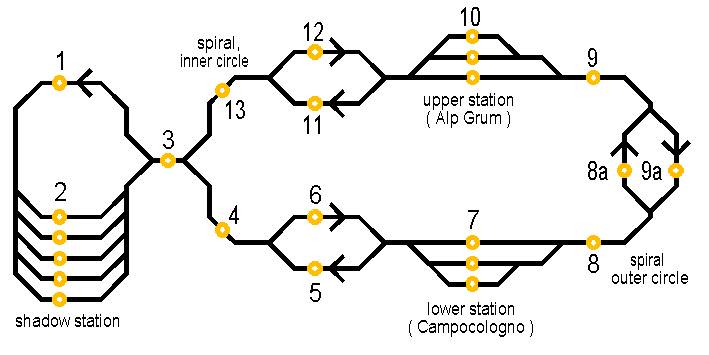
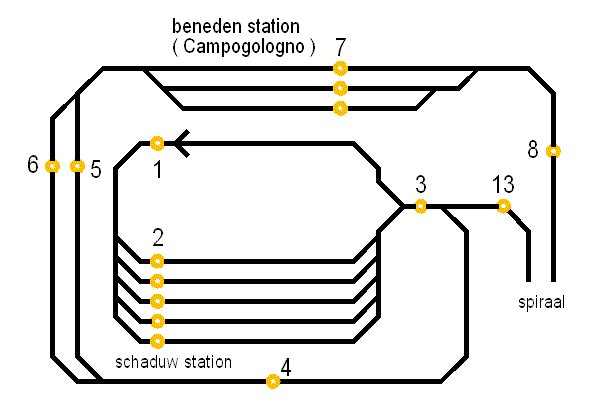
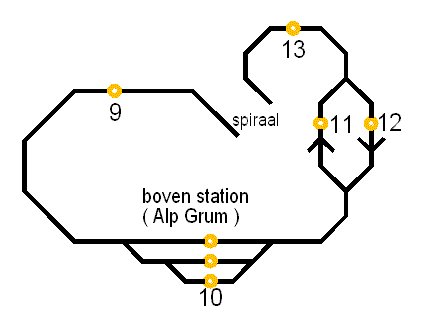
Schematic display of our layout.
With Variation 2, as indicated at
the arrangement of modules,
there will be no change to this scheme. If the layout is
extended with Brusio en Cavaglia, Brusio will be block 8 and Cavaglia
will be blocks
8a and 9a. 2 turnouts take make it possible that a part of the
spiral will no longer be used and is replaced by the extension.
There are 3 main stations. one hidden station, invisible from the front side but very accessible and visible for the public from the real side. This is shown in the picture above, the left side loop is indicated by block numbers 1 and 2. This part can be used in one direction only in order to make the use of it a lot easier. The other 2 stations (blocks 7 and 10) are visible from the front side and form the other loop of our eight. Theses 3 stations are manual controlled separately. To make it easier, we created an automatic crossing station in between all manually controlled stations. This enables us to send a train to the other without bothering about him having room for it. Its possible it send a train to the crossing station only if it is free and if the track leading to it is also free. The train stops automatically in the crossing station and the controller of the next station can pickup this train as soon as he is ready. The block numbering of the crossing station between Campocologno and Alp Grüm (block 8a and 9a) is different because this was initially left out but later on implemented anyway. Blocks 8, 8a and 9a form the outer ring of the spiral and blocks 11, 12 and 13 form the inner ring of the spiral. Below is a scheme that shows how the layout is divided into levels.