|
In contradiction to many layouts we have chosen to create a setup with much difference in
altitude in both the landscape and the rails.
This makes it really a train in a mountain landscape.
The total difference in altitude of the tracks is 43 cm, that of the landscape approximately
1,20 meter, This gives, together with the 20 cm of the basis a total
height of 1,40 meter.
You can click on most photos for an enlargement in a new window.
Click here to advance directly to the newest shot.
|

|
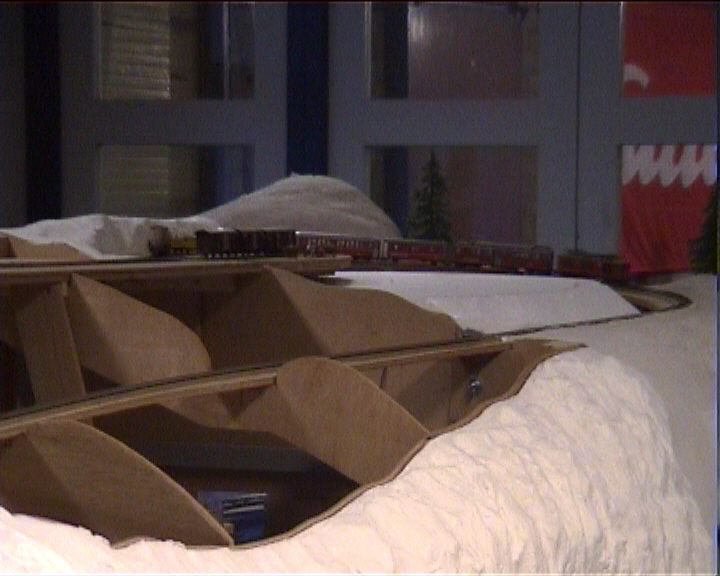
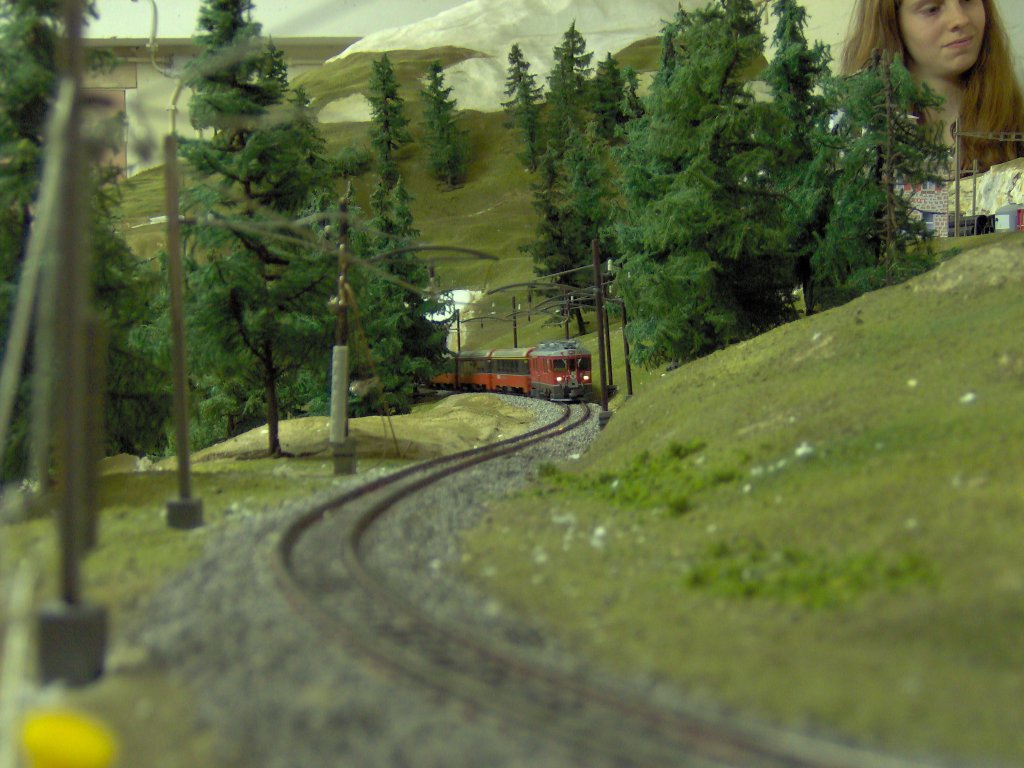
Rails opposite Landscape
Only the stations of Alp Grüm and Campocologno plus the turn and the
following part of the track below the station of Alp Grüm are visible from the front,
those form the blocks 7, 9 and 10, see "
The rail plan".
The rest of the track is hidden from the front. We have chosen this because it is
important to us to have a layout that is not overloaded with rails. It should be a train
in the landscape and not an bunch of rails where you have to search for the landscape.
The photo shows our layout in November 2000
|
|
Substructure (contours)
The sides of the modules have been sawn in the form of the landscape. This allows us to make
the landscape in-between from very light polystyrene foam. The landscape plays no part in the
construction. Over the polystyrene foam we apply a few layers of plaster bandage to prevent
it from damaging and to achieve a strong lightweight construction.
We applied a light brown latex paint and before it sets a layer of woodland scenics
turf, color earth, is sprinkled. Not too dense but rather
irregularly. This forms the foundation for our vegetation. The color
of the light brown latex paint is about the same as the ground color
of the real Swiss landscape
The photo shows the layout in March 1999
|
|
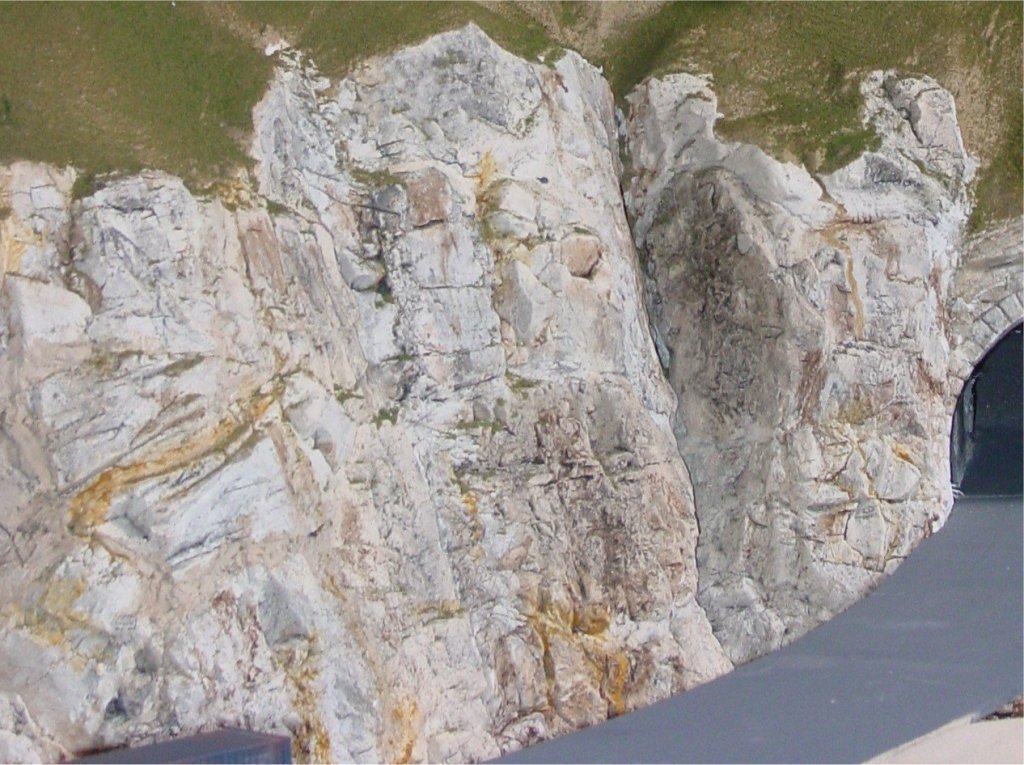
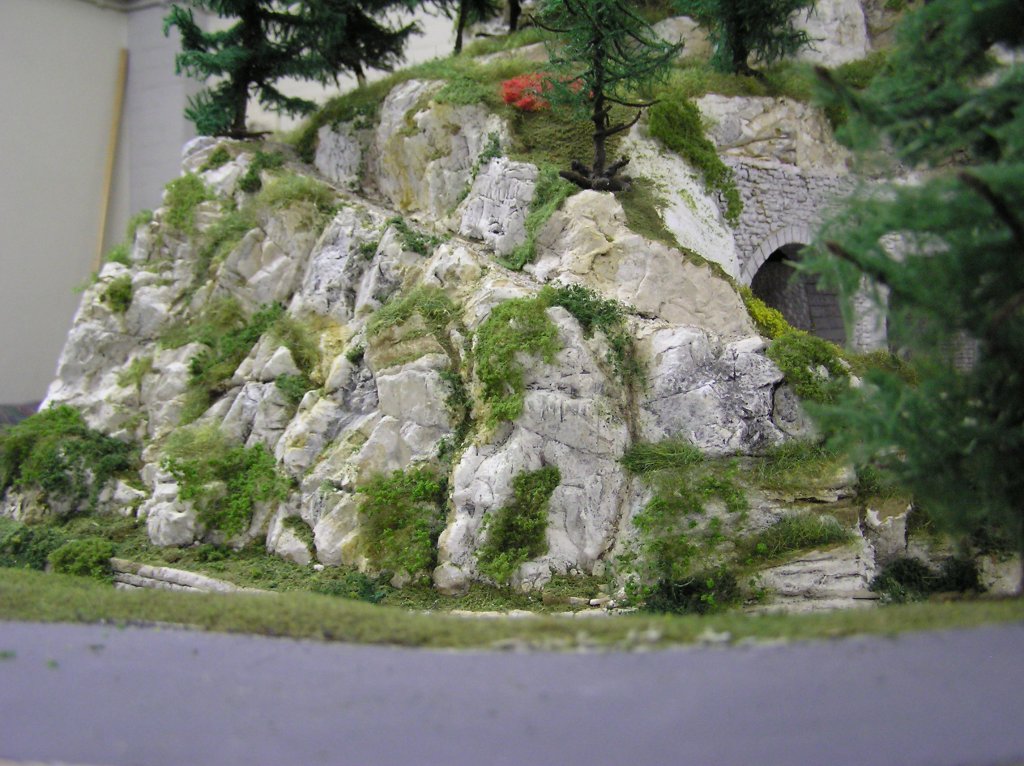
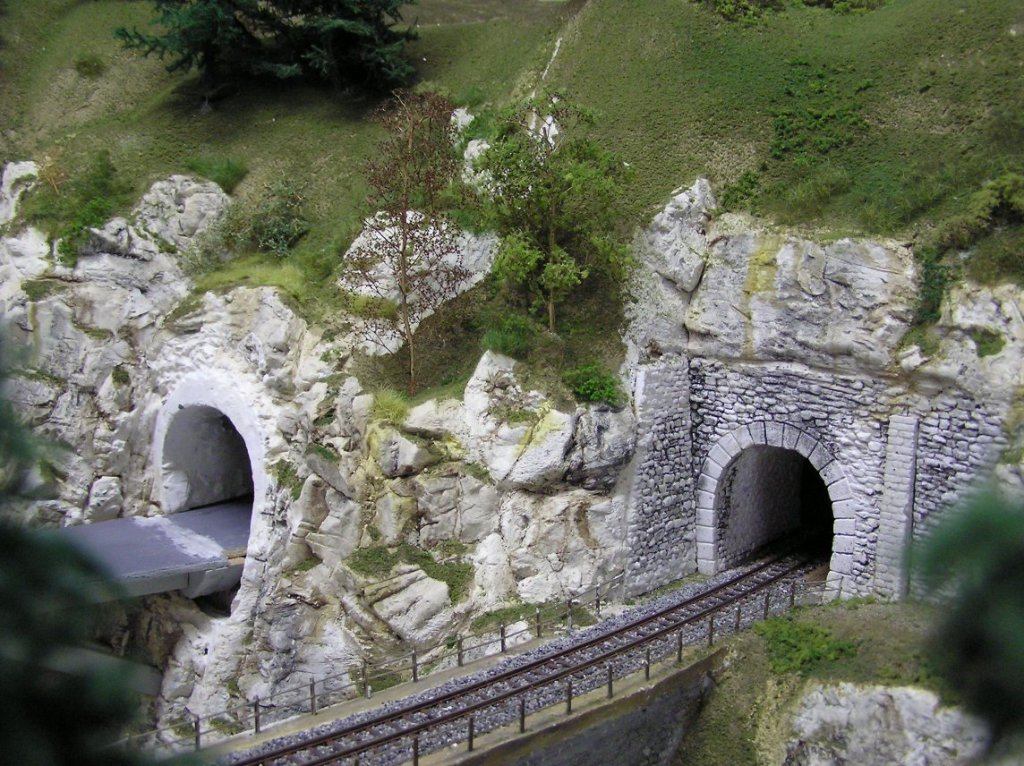
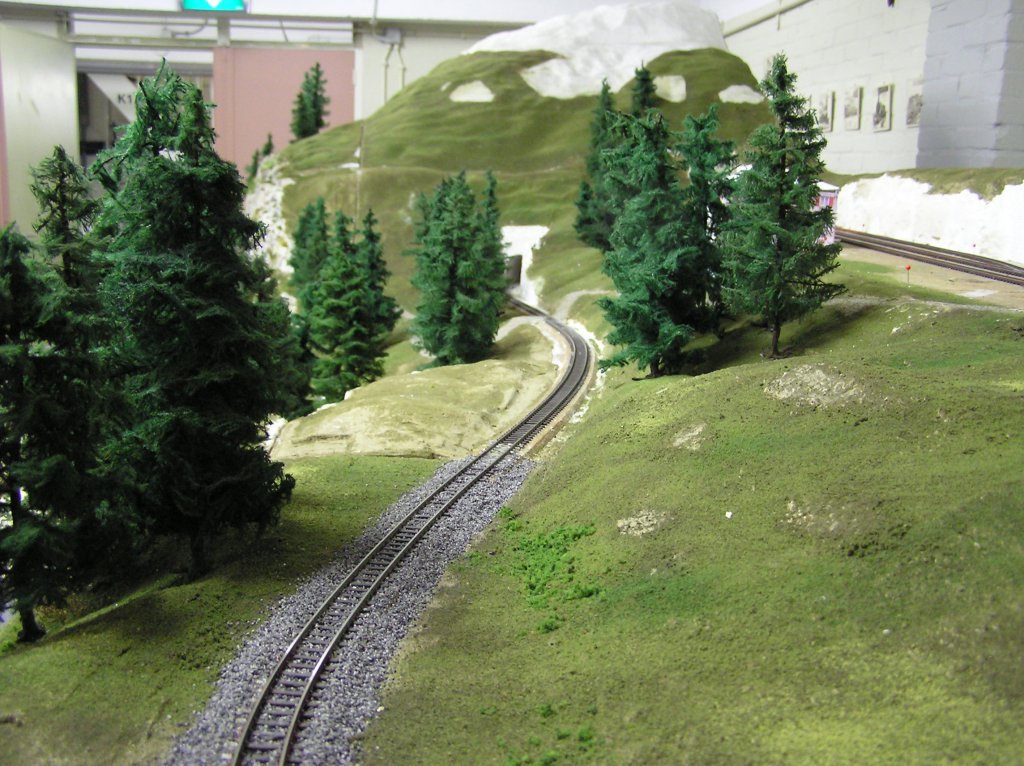
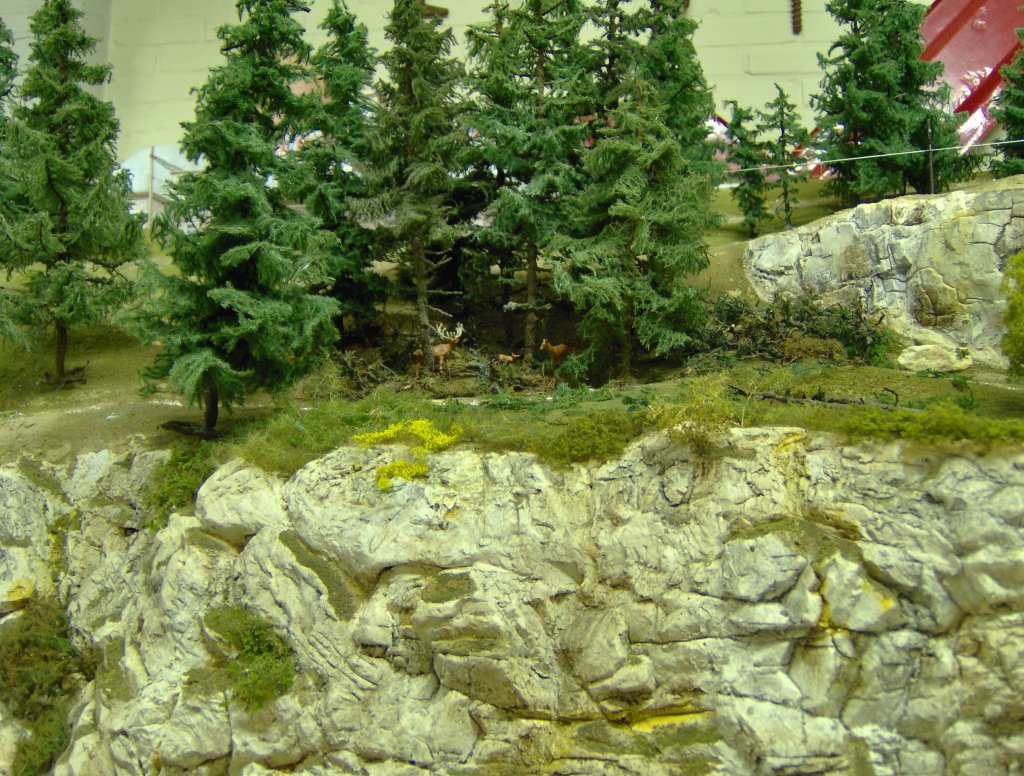
Rocks
Rocks are made of plaster. Liquid plaster is pored in commercially
available and in home made molds. After the plaster has set, it is
removed from the mold and dried. Once you have enough of them to
form a rock face, you put them on tub of water until they are full
of water, now they are easy to shape with a chisel. Glue them on the
substructure of plaster bandages with plaster, lots of it. The holes
between the pieces can be filled with plaster or, if you used enough
to glue them, it will come out by itself. Shape this excess plaster
with a toothbrush or other hard material. Then color the the plaster
with very thin acrylic paint and water mordant. This method is
documented in the Signalglocke 2001 and in Rail Hobby 1997/1.
|
|
A rock face on the left hand side of the layout with
the footpath from Campocologno to Alp
Grüm. This part of the path is a bit steep, but who cares, also as a
model walker you have to do your best to reach beautiful places.
|
|
Trees, leaved trees
There are various methods for making leaved trees. On the Bernina Bahn,
the accent is more on needle trees and we opted for quite simple
leaved trees. They are made of natural material which has been sprayed with bison-glue
spray and thereafter sprinkled with coarse-turf from woodland scenics
and other brands like Heki. Sometimes we darkened the light-colored
trunk with water mordant (like walnut color,
used to do floors).
Here a very unique tip. make sure you're not bothered by mice, they
like this material and take it for building a nest. Unfortunately we
did suffer mice in our cellar so lost of our work has been lost and
had to be re-done. luckily they didn't like our needle trees, that
would have been a catastrophe.
|
|
Trees, Needle trees
Spruce trees and larches can be real eye catchers on your model
layout. Our trees are home grown following a method that consists of
mainly four steps being: creating the trunk and the branches,
creating mats for needles, gluing the mats onto the branches, giving
the tree its final shape and color. It takes a few hours per tree
but the result is beautiful . This method has been published
in Railmagazine May 2004.
Click here
or look in the left hand column under modeling tips and you will
find a complete description on our site (in Dutch with photo's).
|
|
Grasses
Grasses exist in many varieties and have many colors but green. In order to
mimic nature a bit, the modeler needs to apply several shades of
color. Its best to use various methods next to each other. take a
look at the Swiss landscape and you'll see most places with grass
are being mowed and/or eaten by cows, horses and sheep. In general
gras looks short. Only on places that are difficult to reach you
will find high grass. On the Bernina Bahn we made the short grass
by applying various tints of woodland-turf. This is then fastened by
thinned acrylmedium (acrylic glue).
High grass is made of Heki wildgras/decovlies and sometimes of Silflor.
Various methods for making grasses are documented in the Signalglocke numbers 1/2002
and 2/2002 and in Railmagazine June 2002.
Click here
or look in the left hand column under modeling tips and you will find a full description on our site
(in Dutch with photos).
|
|
Moved field
A small piece of our layout is covered with mowed grass. This has
been made of fine rope (string), cut into tiny pieces. This has been sprinkled
over the substructure mentioned above and then fastened by thinned
acrylmedium (medium mat from Talens, this can be thinned by water, 1
part acrylic and 3 parts of water).
|
|
Gravel
Next to grass and trees, also gravel builds an important part of the
ground coverage. Here in Alp Grüm there is no asphalt on the terrain
but ordinary gravel. In different sizes and colors, and interchanged
with grasses.
Most gravel used here originates from Switzerland.
|
|
Bushes and weeds
Bushes can be made of small pieces of zeeschuim that has been
sprayed with glue and then sprinkled with coarse-turf from woodland scenics
and other brands like Heki. Bushes can also be made of rough brown
sheep wool that has been torn apart and sprayed with glue and also
sprinkled with coarse-turf. To get the effect of dead branches and
leaves you can also apply fine yellow turf from woodland. Please
mind that you should never sprinkle too much on the zeeschuim or wool
or you loose the effect of depth and branch structure. You can also
use a fine moss that you can find in nature yourself. Weeds can be
made from pieces of string, silflor (silhouette) material that was
meant for making needle trees, and various mosses. Also Heki-flor
can be applied directly on the subsurface which gives a good effect.
|
|
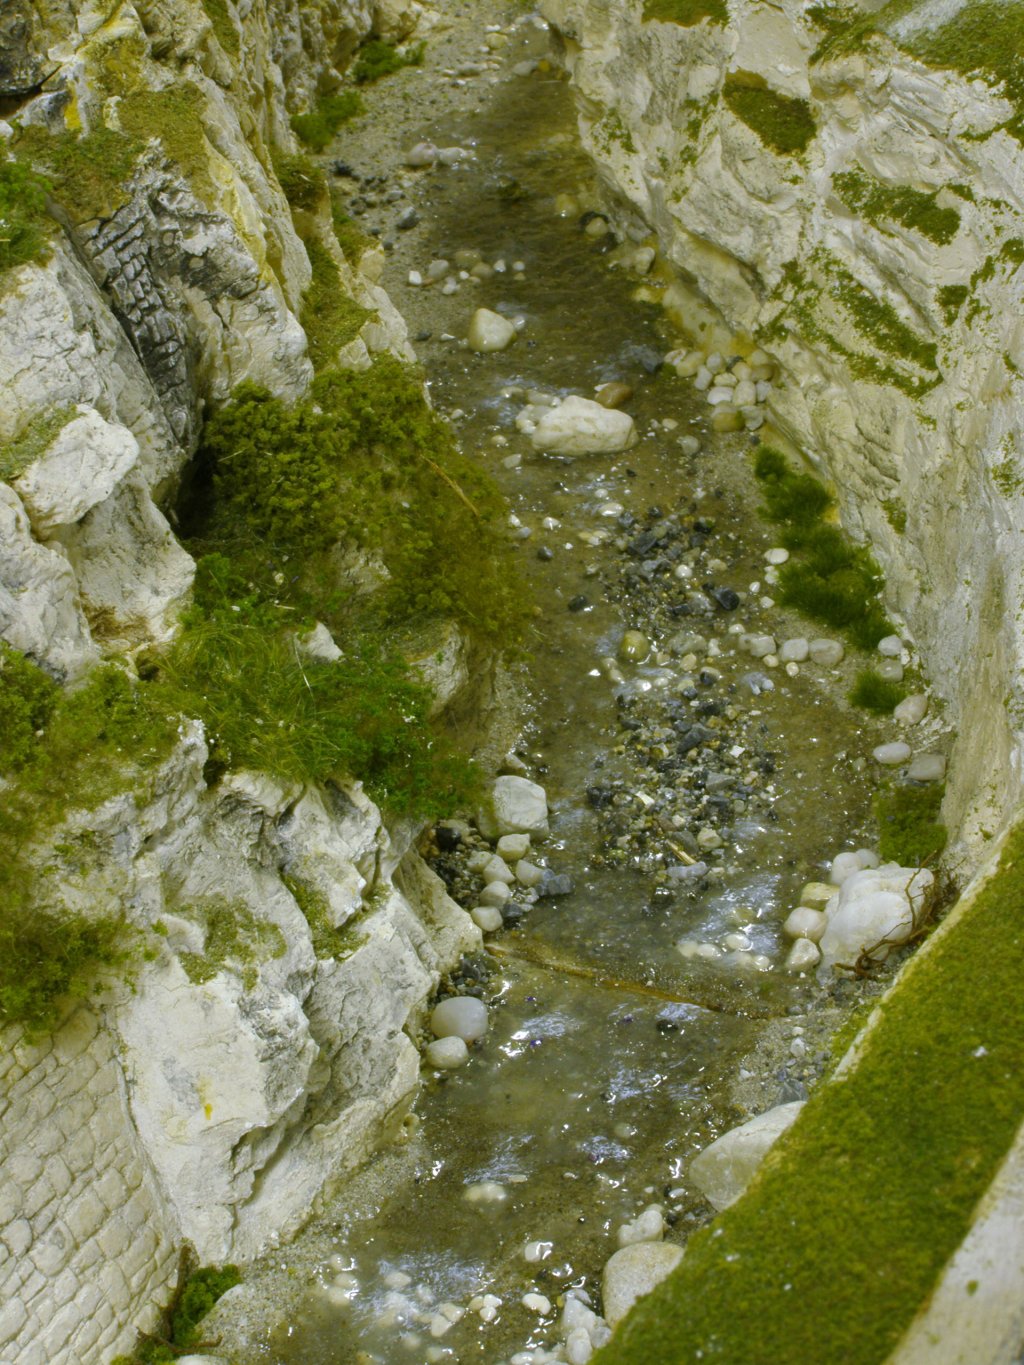
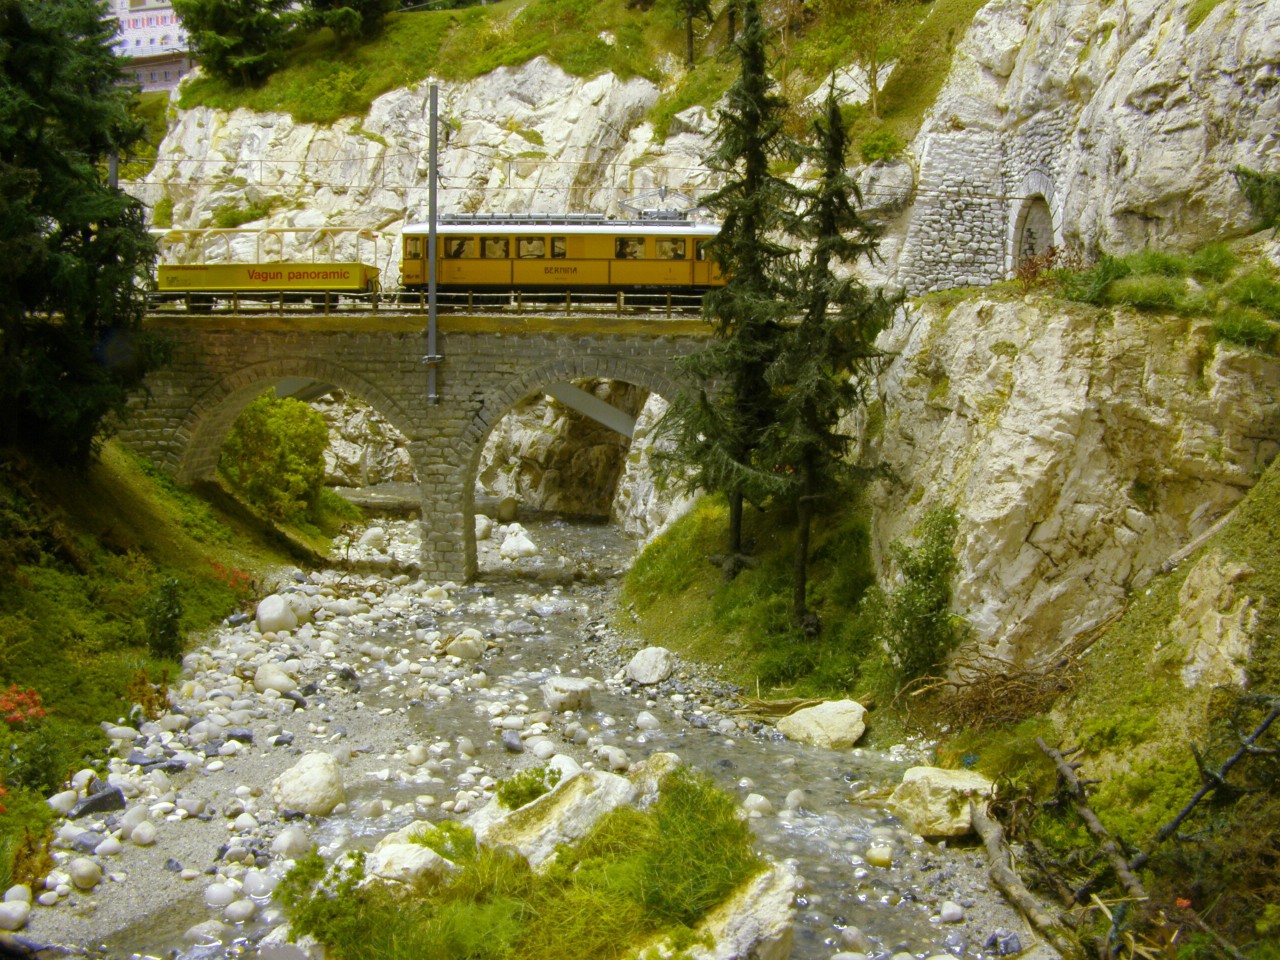
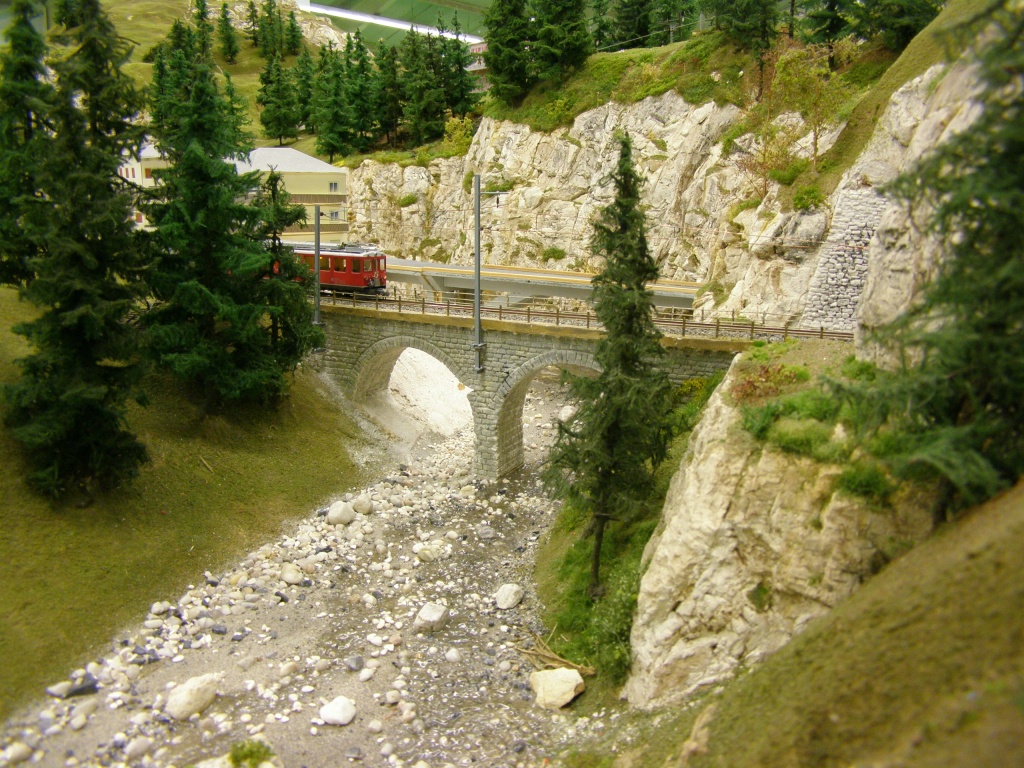
Water
On the Bernina Bahn we have a small river beginning on the foreground
on the left hand side. It flows along behind the station and parking area.
It passes under 3 bridges to end on the front side at your right hand.
We chose the season which doesn't have too much water flowing through
the river so parts of the riverbed are dry. The riverbed is made of sand,
small pebbles en stones in various sizes. We searched for pebbles with
colors that match the surrounding rock formations. We found them in
garden centers and also in the Swiss nature during our holiday trips.
Making a good riverbed is essential, only after this you can apply water.
The water in our case has been made of shining acryl-gel which you can
get from hobby shops. Ca 4 layers of acryl gel are applied with a brush,
carefully watching the stones which can be partly under or above the waterline.
Stones above the waterline are not treated. Advantage of this way of working
with acryl-gel is that you can make waves and no surface like a mirror
which is the risk you have when applying giethars. After the acryl-gel
a layer of acryl shine varnish is applied for better light reflection.
Foaming water is made of white acrylic paint. An overview of methods
for modeling water can be found in "de Modelspoorwegen" August 2004
and January 2005 (This is a leaflet from the contact group NMRA Netherlands)
and a method for waterfalls is documented in the Signalglocke 2/2006 .
Click here
or look in the left hand column under modeling tips and you will
find a larger article about water on our layout (in Dutch with
photos).
For more photo's about how we create our landscape, please take a
look at the page Campocologno-Brusio in the left hand column or
click here.
|
|
|
|
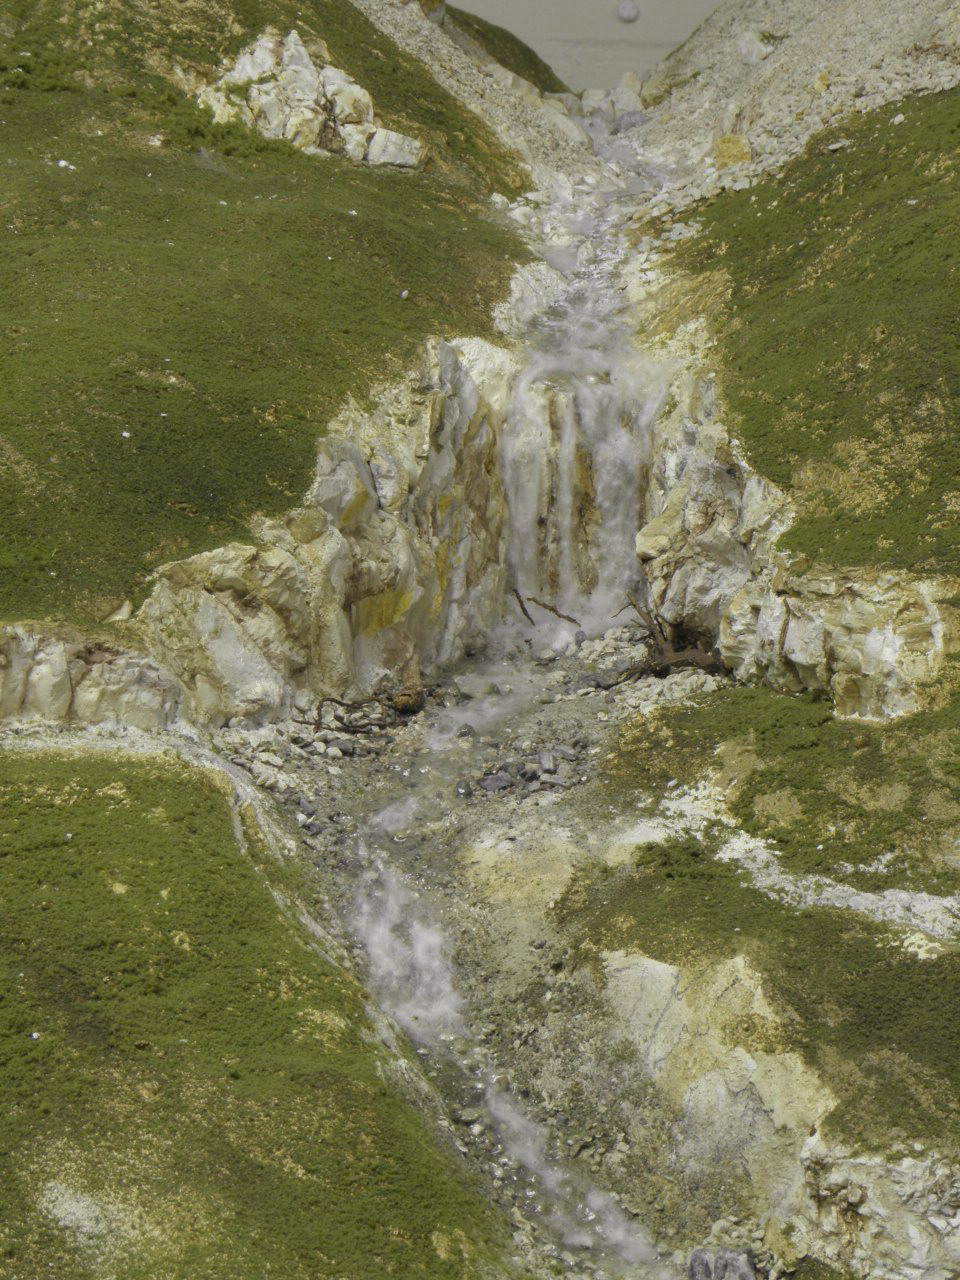
Waterfall.
On the modules between Campocologno and Brusio we have created a
slope full of debris, a little stream with a strong decline and waterfalls.
The riverbed is made of pebbles
(a combination of plaster and cat litter). Over that a few layers of
shining
acrylic paint and, after drying some pieces of white textile that has
been pulled apart. Also for the white-water falling from the waterfall is
made from this textile. Look at the
modeling tips
for more details (in Dutch).
|